
How-to: Build a layer 2 private network, subnet & route it to the internet.
This blogpost covers the basics of how to quickly build a tenant network and router connected to the internet all through the Fujitsu Cloud Service K5 IaaS portal.
Step 1. Login to the K5 platform
If you’re reading this guide the assumption is that you already have access to a Fujitsu K5 based project. You should already have been supplied with the following details:
- region
- contract number (domain in OpenStack parlance)
- username
- password
- project id
- login url
Login to the portal using these details as follows –
Once logged in you’ll be presented with the K5 dashboard.
Now we’ll start to build up our environment step by step. Although we’re entering a ‘virtual’ world of infrastructure the physical principles that we’re familiar with still apply.
Networking
We’re going to create a private layer 2 network (a.k.a. tenant network in OpenStack terminology), followed by a router. This router’s gateway must be set to the external-network and another interface on the router will be connected to a subnet on the tenant network.
Note: If you don’t create the router and link it to the external network then you will not be able to connect to your instance unless you have a jump box already setup on this tenant network.
Step 2. Select the network option

Step 3. Select the virtual network option

Step 4. Click the Create Virtual Network button

Step 5. Complete the details on the virtual network tab – select the availability zone that you will be using. This should be the same as the availability zone in which you’re going to build your instance. Enter a name for your private/tenant network. Then select the subnet tab.

Step 6. Fill in all the subnet parameters customised to suit your environment. Then select the subnet details tab.

Step 7. Ensure DHCP is enabled and then select the Create button.

Congratulations – Fujitsu’s K5 SDN, OpenStack Neutron, will now create a layer 2 private tenant network with the required subnet for you. Once complete it should look something like this –

Now we need a way to access, or dare I say route, to this private network from the outside (public) world.
Routing
Let’s now build a router to link this new network with the external network (internet).
Step 8. Select the Virtual Router option from beneath the Network menu on the K5 IaaS dashboard. Then we need to click the Create Virtual Router button.

Step 9. Select the same availability zone where both your network and your instance (vm) will reside. Enter a name for your router and click create.

Step 10. Configure the router’s gateway to the external network once it’s created. Click on the router’s action button and select gateway settings from the dropdown menu.

Now select the network that has “ext-net” in its name. This is the external network. Once selected click on the settings button to confirm gateway.
Note: Don’t select the subnet you just created which is also visible from this dropdown.

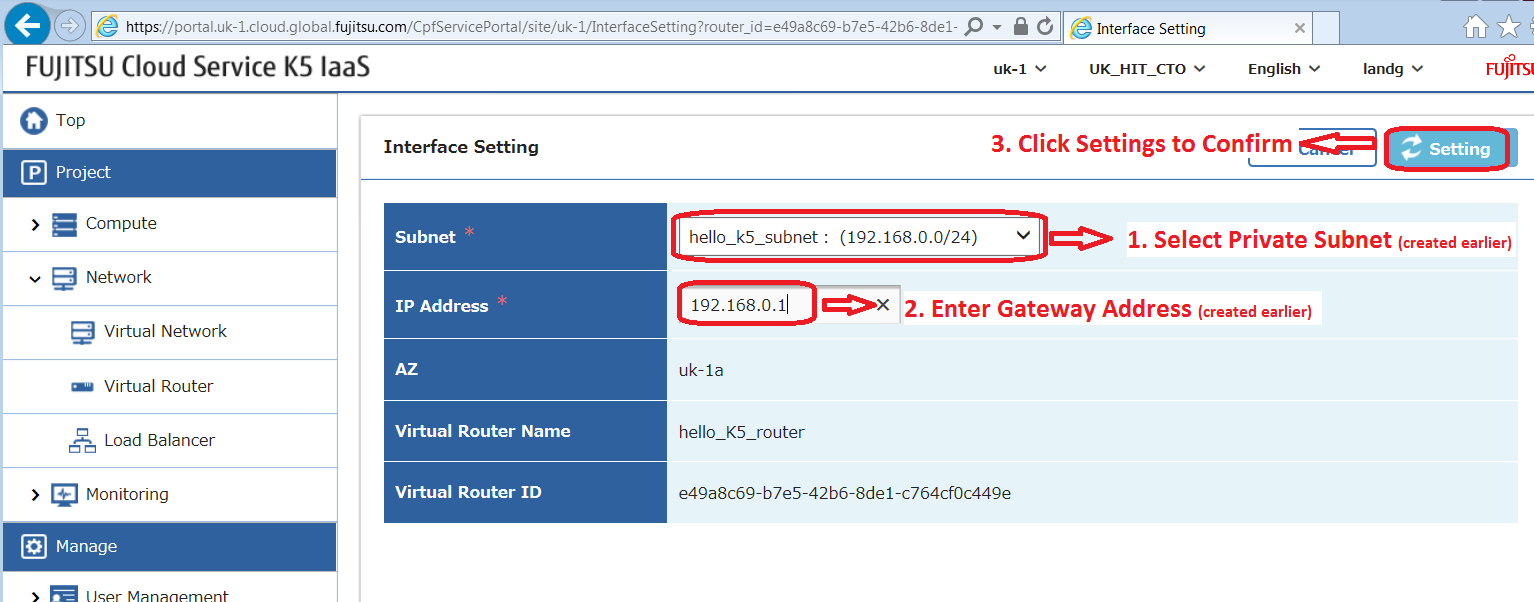
Step 11. Attach an interface on the private network to this router. We will use the subnet’s gateway address that we set earlier during the subnet creation process above. First we need to select the router’s name which is a hyper-link.

Select the Add Interface button.

Select the private subnet created earlier – in my case “hello_k5_subnet”. Enter the subnet’s gateway, also defined previously, and finally click the settings button to confirm.
You should now be presented with a router details screen similar to this one –
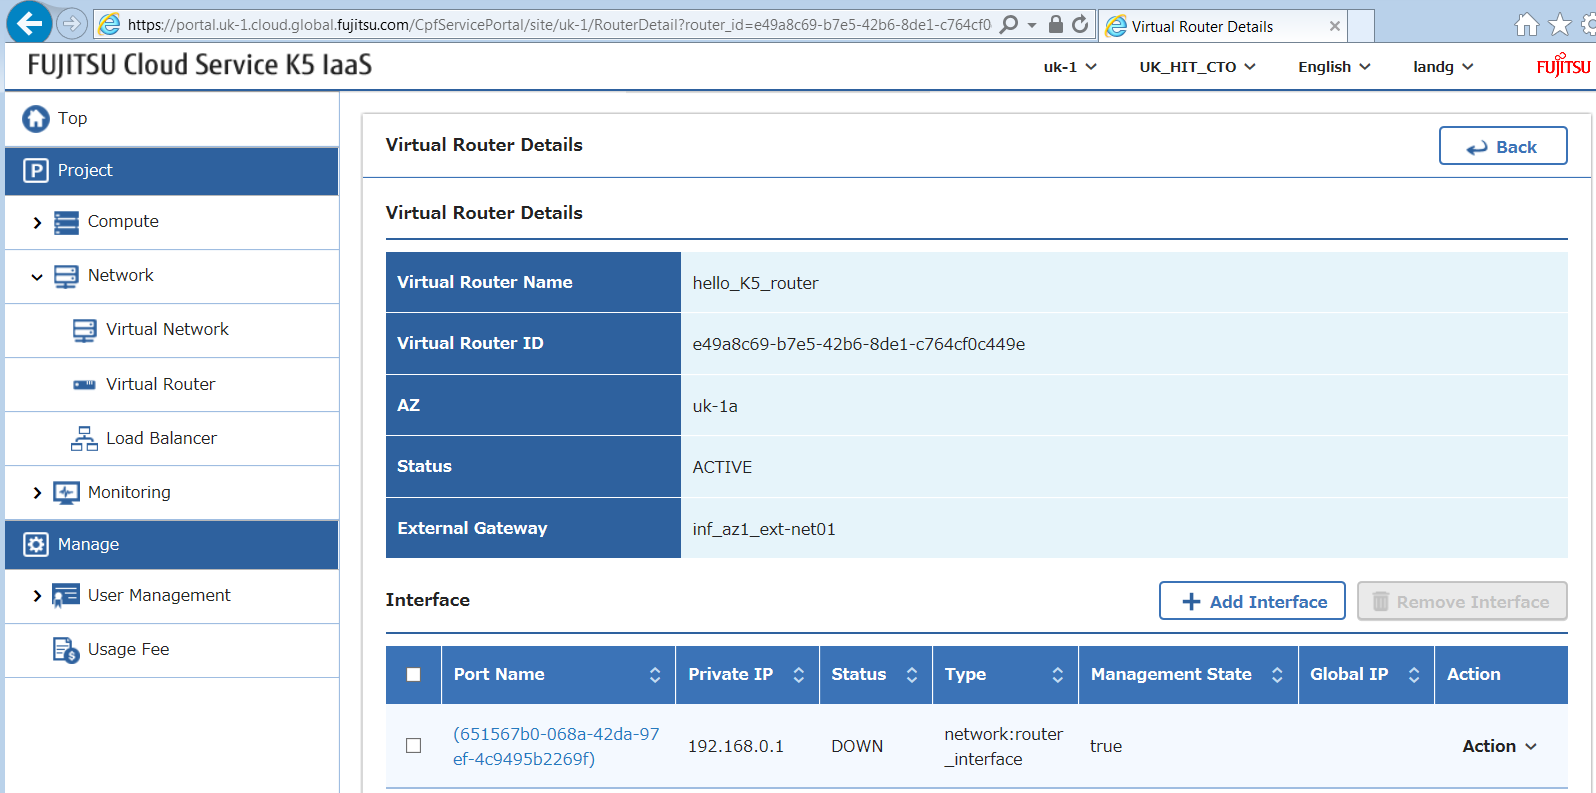
And that’s all there is to do for the networking and routing to work on Fujitsu’s K5 IaaS platform – “Simples!”
All that remains is for us to create an instance on the new network, assign a global (floating) ip address and open up the necessary ports on the security group. Stay tuned for the next few blog posts which will cover these details.
Happy Stacking!

Leave a comment