
Many of you networking gurus out there may not understand the need for such a post. As someone who is new to both OpenStack and networking this process was not clear for me.
The following diagram illustrates the setup I was using – On one windows 7 laptop I was running VMware workstation 10 and within this I had a self-contained Cloud Service Automation (CSA) vm. The network on this vm was bridged to my laptops interface allowing this vm to receive a DHCP address on my local network 192.168.1.0/24. The second system I was using was a DL360G7 which had Ubuntu 14.04 as the host operating system also attached to the 192.168.1.0/24 network. This DL360G7 was host to a virtual installation of Helion OpenStack v1.1 [this install process can be found in this earlier post].
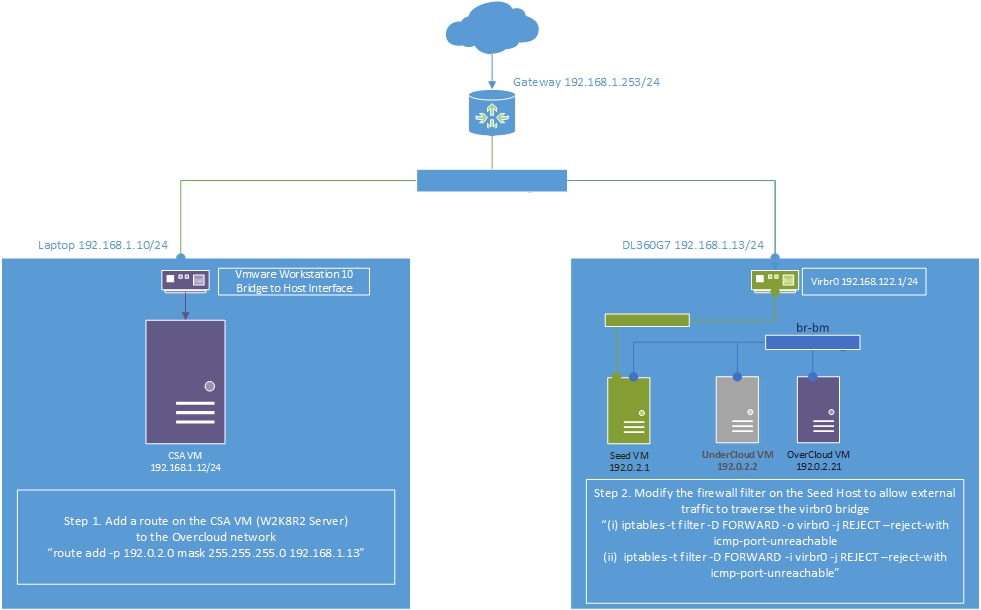
Step 1
Obviously there needs to be a route on the CSA windows 2k8 server host to the API endpoints of the HOS service that I wish to consume which are on a 192.0.2.0/24 network. This does not exist by default which can be seen when looking at the host routing table below.
netstat -rn

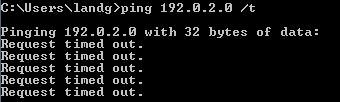
A quick ping from the CSA server to one of the HOS hosts also confirms the routing issue.
ping 192.0.2.2 /t
The 192.0.2.0/24 network is virtualised on the DL360G7 and can only be accessed remotely through the physical interface on the DL360G7 which has an ip address of 192.168.1.13. This is called the gateway address.
Open a command prompt window on the CSA server: Start -> Run -> cmd
Enter a route to the HOS network using the following command
route add -p 192.0.2.0 mask 255.255.255.0 192.168.1.13
The network routes on the CSA host should now look something like this (we’re only concerned about the new addition of 192.0.2.0 – it’s likely there could be many other routes on your system).
netstat -rn
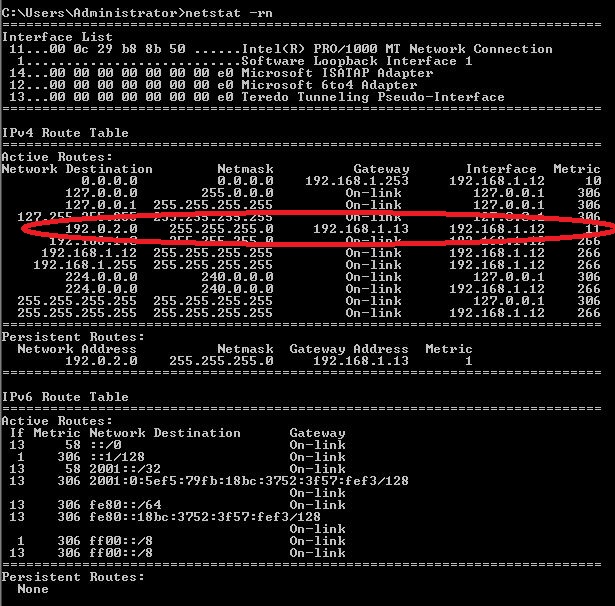
Now when you ping a server on the 192.0.2.0/24 network you should see a response from the DL360G7 host server. Don’t panic! – Yes, it’s still not working but at least you can see that the correct host is now responding to your request.
ping 192.0.2.2 /t

Now it’s time to move over to the DL360G7 Ubuntu host server. Leave the ping running on the CSA host server [use the /t option].
Step 2
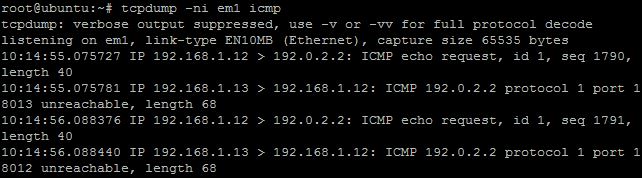
If we look at the host interface now on the DL360G7 HOS host server we can see that the ping request is coming in, however it is not getting a response.
tcpdump -ni em1 icmp
The routing tables on the Ubuntu server indicate where to look next.
netstat -rn

All traffic for the 192.0.2.0/24 network is routed through interface virbr0
Examine the output on this virbr0 interface to see what is happening to the traffic.
tcpdump -c 10 -ni virbr0

There are no signs of any ping requests from the CSA host 192.168.1.12 getting this far.
So the problem is between the em1 interface and the virbr0 virtual interface – what’s between these interfaces? Iptables! also known as the host firewall.
A quick look at the iptables on the DL360G7 Ubuntu host reveals the final hurdle in the quest for a route between the systems – filters rejecting the external traffic.
iptables-save
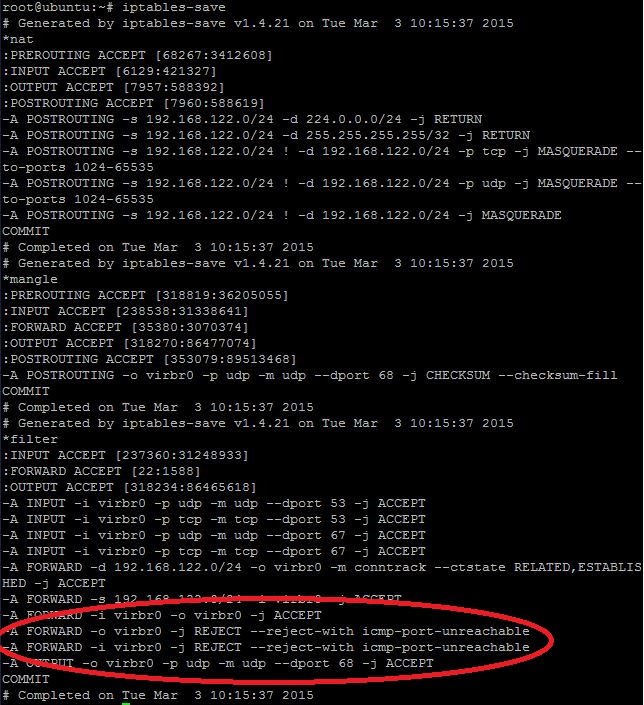
Deleting these two filters should allow all traffic to route between the two hosts.
iptables -t filter -D FORWARD -o virbr0 -j REJECT --reject-with icmp-port-unreachable

iptables -t filter -D FORWARD -i virbr0 -j REJECT --reject-with icmp-port-unreachable
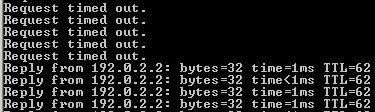
Ping is now getting a response from the target server. Let’s also look at the traffic on the virbr0 interface – we should now see the ICMP reply packet.
tcpdump -ni virbr0

There is now full connectivity between the CSA vm hosted on the laptop and the Helion OpenStack hosted on the DL360G7 server. Next task – to start using CSA to orchestrate HOS….

Leave a comment